2024-08-15 John Weaver Senior Program Developer
Summary
Sometimes, we need to initialize an external disk. How to initialize a disk on Windows? How to recover the lost data afterwards?
Initialization for external hard drive is a scheme for new hard drive configuration. Unlike formatting, initializing is to input data into the disk or activate the disk while formatting is to format the disk partition. Generally, a new hard disk should be initialized > partitioned > formatted .
Why External Disk should be Initialized?
1. Hard drive is not showing up in File Explorer
When you connect a new hard disk to the computer, it may not be shown in File explorer.
2. Unknown, uninitialized or unallocated hard disk
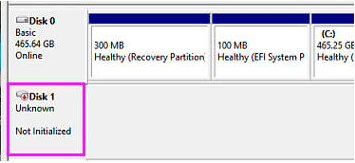
We are unable to get access to the unknown or uninitialized hard disk. Virus attack, damaged MBR (main boot record), lost partitions, bad blocks and the damaged system files can cause this problem. At that moment, we can try to use the data recovery software to recover the data.
How to Initialize External Disk on Windows?
① In Windows 8/10, press [ Win + R ] to open Run. Then, type [ diskmgmt.msc ] to open Disk Management. As for Windows 7 users, you can right-click at [ Computer ] and select [ Manage ].
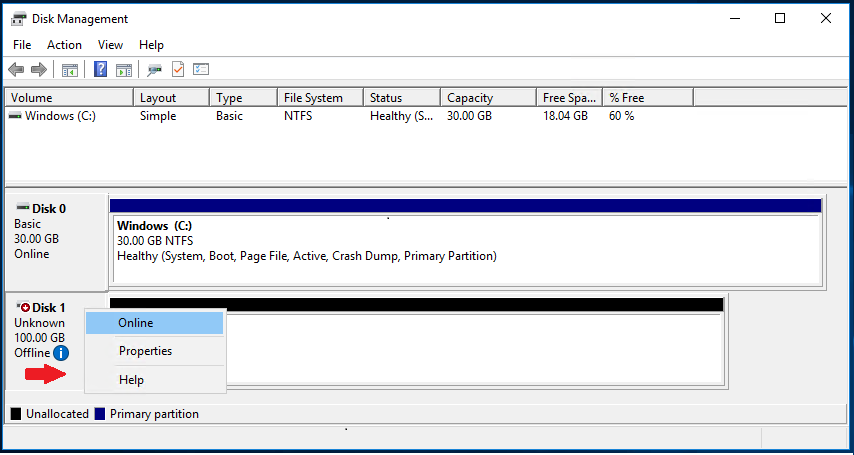
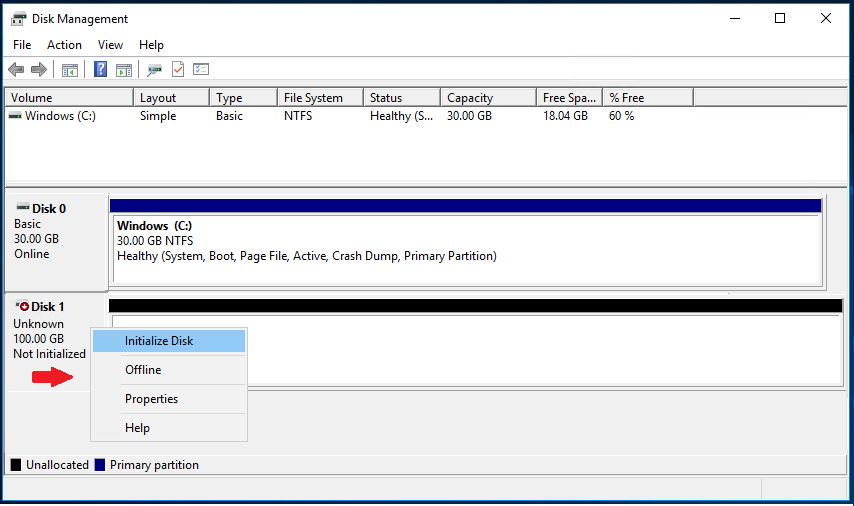
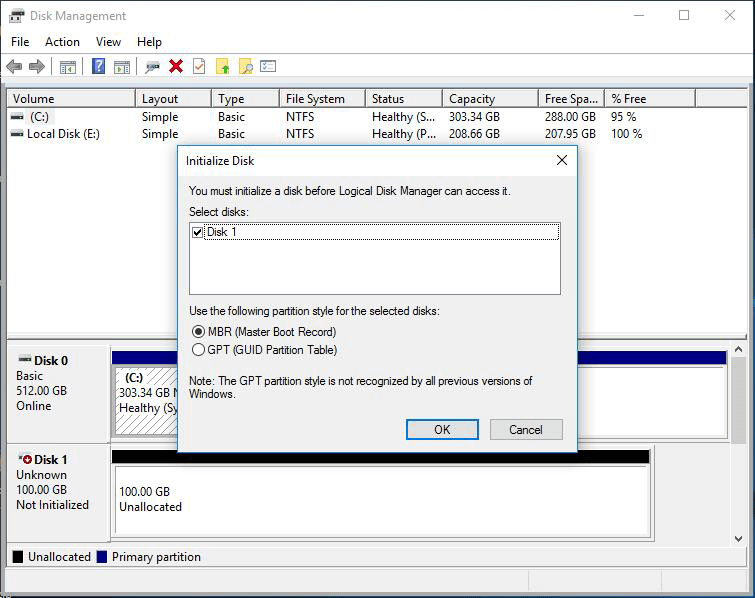
② Find out the target hard drive. Then, right-click it and select [ Initialize Disk ]. If the disk is offline, please right-click at it and select [ Online ] at first.
③ Select the target disk, and then click [ OK ] to confirm the partition type. If the default option is not satisfied, you can change another one, GPT or MBR.
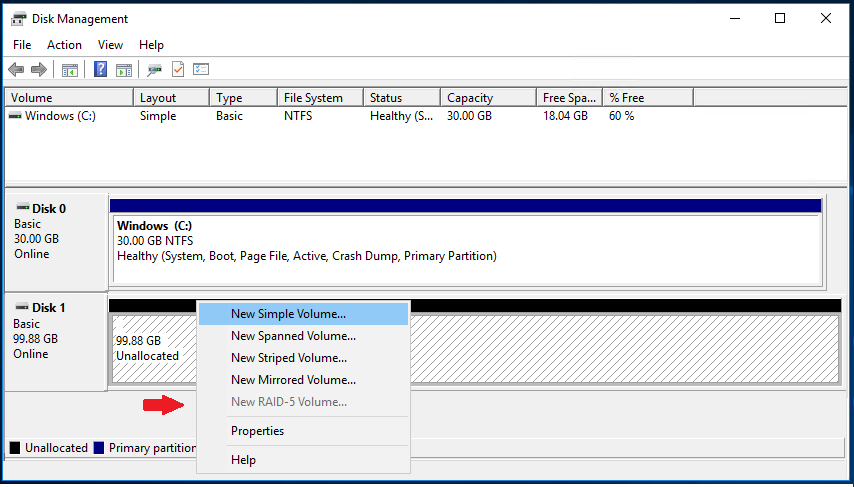
④ After that, the disk will be shown as “unallocated”. We should right-click at it and select [ New Simple Volume ]. Finally, follow the prompts to make partitions and format the disk. It is believed that the disk will be normal.
Tips!
- MBR (main board record): applied to hard disk drives up to 2TB.
- GPT (GUID Partition Table): applied to hard disk drive over 2TB.
If you want to know about MBR and GPT, please refer to “ What is MBR or GPT ”
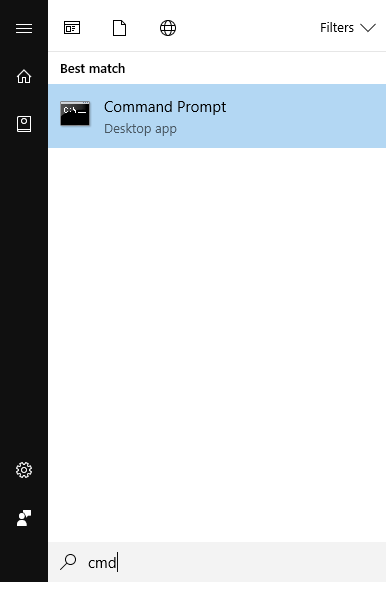
① Press [ Win + Q ] to open the search window. Type and search [ cmd ].
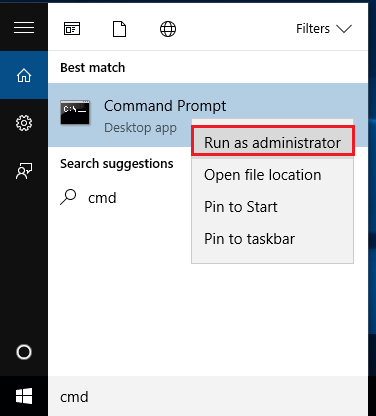
② Right-click at the result [ Command Prompt ] and select [ Run as administrator ].
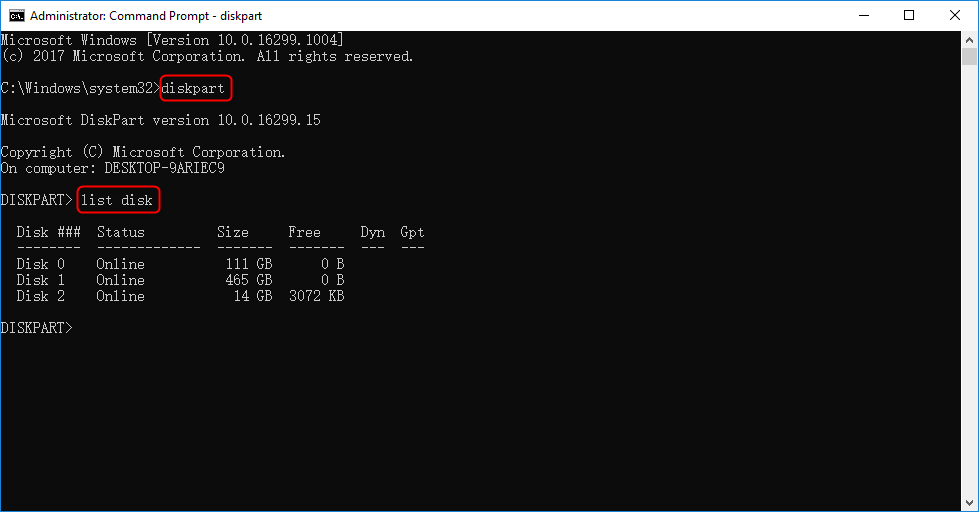
③ Type [ diskpart ] in Command Prompt and then press Enter to run. Next, type [ list disk ], an order to check all connected disks.
④ Type [ select disk 1 ]. “1” is related to the number of the target drive in this case. You can type the number based on you own needs.
⑤ Type and run [ clean ]. At that time, it will show you that DiskPart has successfully cleaned the disk.
⑥ If you want to create the main partition on MBR disk, please type and press Enter to go on each steps: [ create partition primary ] > [ format quick fs=ntfs ] > [ assign ] > [ Exit ].
⑦ If you want to create the main partition on GPT disk, please type and press Enter to go on each steps: [ convert gpt ] > [ create partition primary ] > [ format quick fs=ntfs ] > [ assign ] > [ exit ].
⑧ Through these operations, the hard disk will be normal.
Tips!
- MBR (main board record): applied to hard disk drives up to 2TB.
- GPT (GUID Partition Table): applied to hard disk drive over 2TB.
If you want to know about MBR and GPT, please refer to “ What is MBR or GPT ”.
How to Recover Data from Initialized External Disk?
Renee Undeleter , professional software for data recovery, supports various file types and contains three scan modes, including fast partition scan, whole partition scan and whole disk scan. Even though the hard disk has been initialized and the partible table has been damaged, it can reestablish the table with the algorithms and recover the data from each partition.
Renee Undeleter - Powerful Data Recovery Software 
Easy to use Only simple steps to recover data from storage devices.
Multiple scan modes Fast partition scan, whole partition scan and whole disk scan for different recovery needs.
File types Support to recover pictures, videos, audios, documents, mails, etc.
Supported storage devices Recover data from recycle bin , SD card , external disk , etc.
Supported systems Windows 10, 8.1, 8, 7, Vista, XP, 2000 and Mac OS X10.6, 10.7, 10.8.
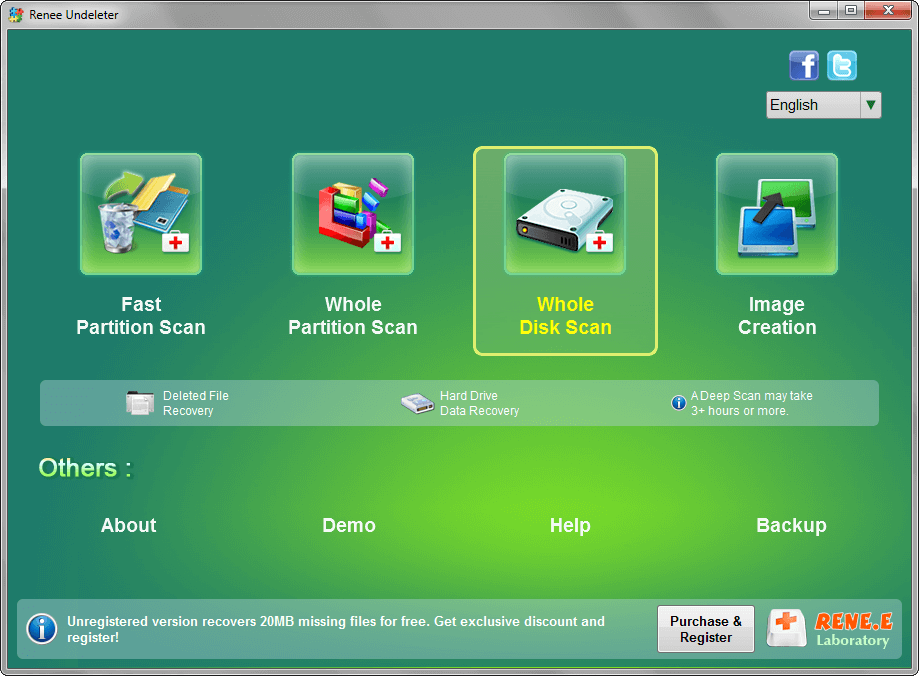
① Download and install Renee Undeleter. Then, select [ Whole Disk Scan ].
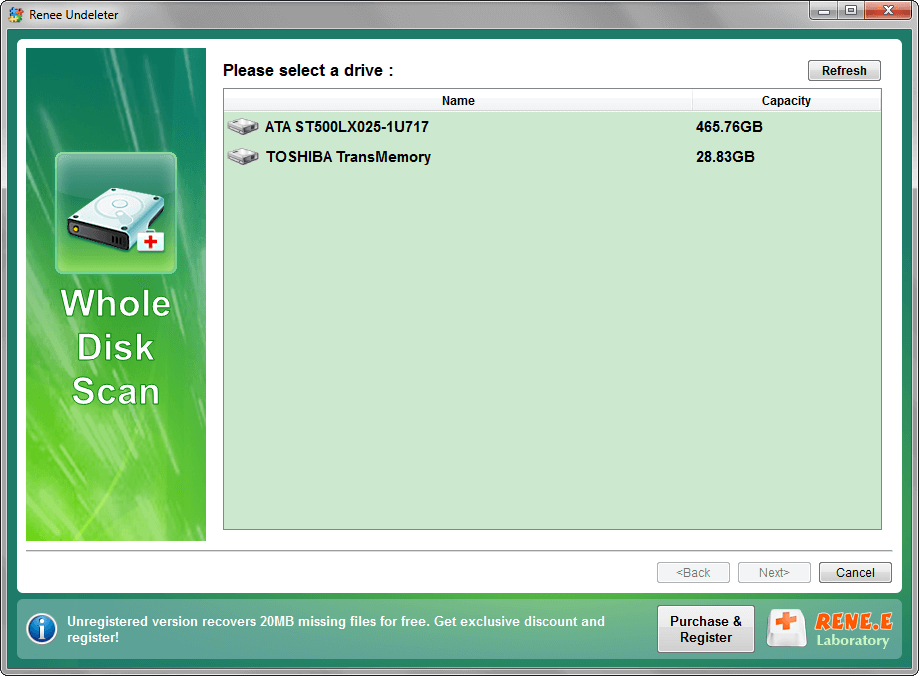
② Select the target drive and click [ Next ] to go on.
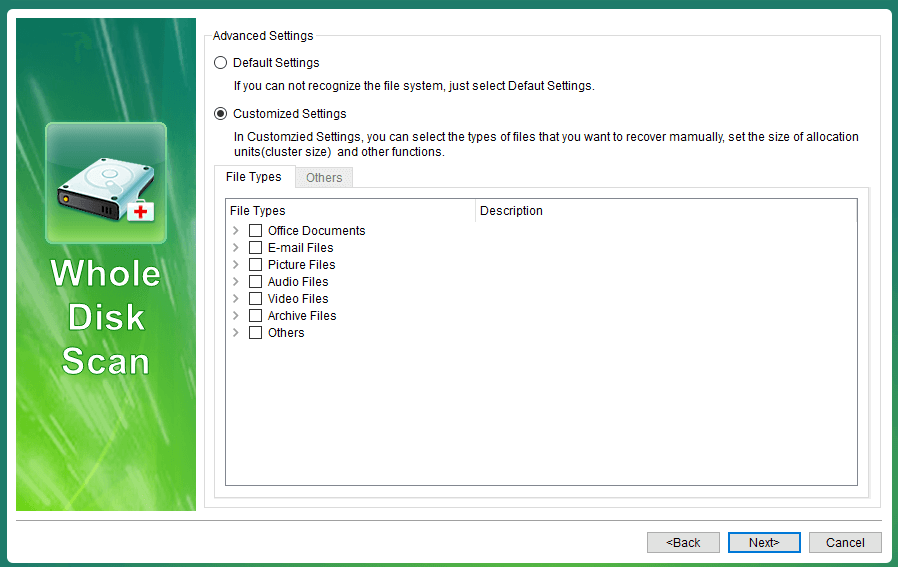
③ Then, select the file types you want to recover. If you are not clear, you can select [ Default Settings ].
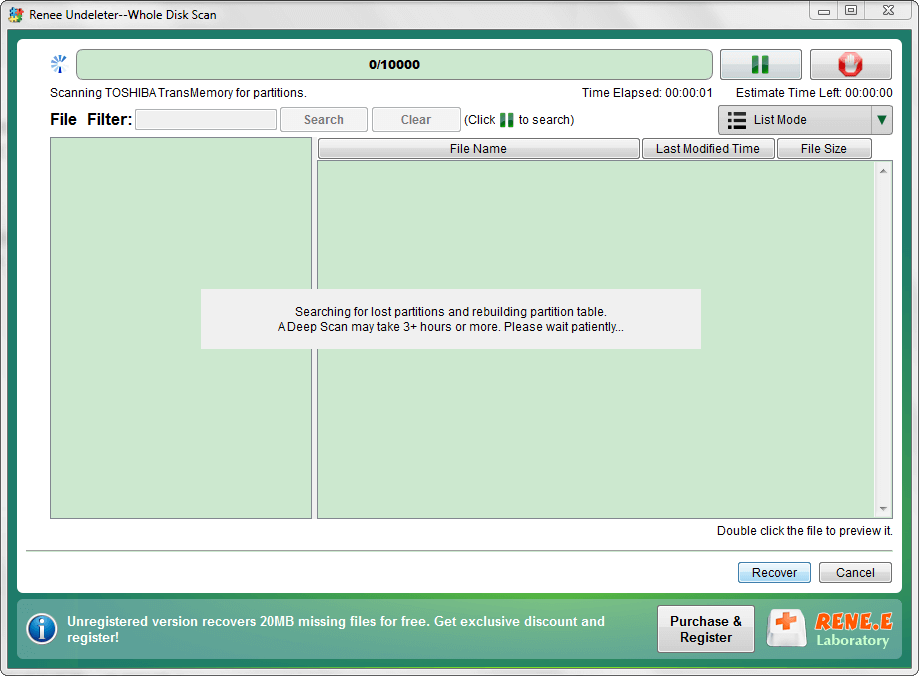
④ Wait for scanning. Finally, double-click to preview the results and check the target files. Click [ Recover ] to save.




Comments
0 comments
Please sign in to leave a comment.