III. Detailed introduction of Micro SD card repair method
1. Change the drive letter of the Micro SD card in the computer
When the Micro SD card is connected to the Windows computer but cannot be recognized, you can try to change the drive letter of the Micro SD card. Specific steps are as follows:
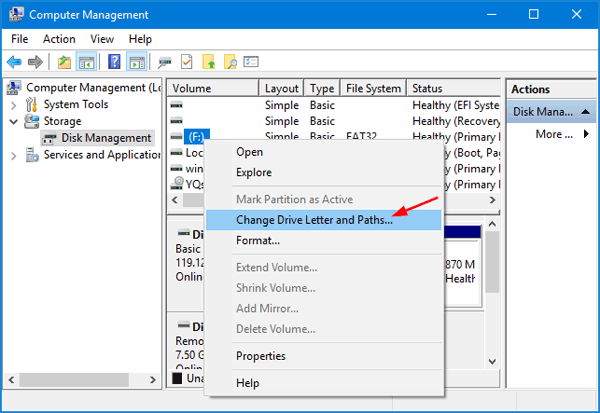
Step 1 : Use a card reader to connect the Micro SD card to the Windows computer, right-click the ( Start ) menu, and select ( Disk Management ).
Step 2 : Right-click the Micro SD card, select ( Change drive letter and path ), change a drive letter for the Micro SD card, and then go to the file explorer to check whether the Micro SD card has been recognized.
2. Update the driver of Micro SD card
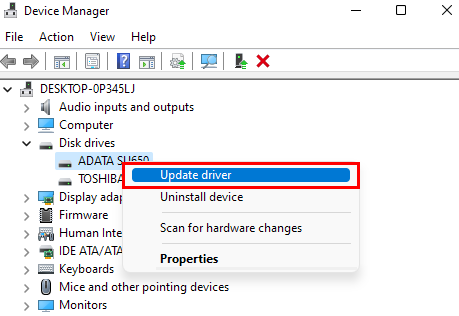
Step 1 : When the Micro SD card is connected to the computer, right-click the ( Start ) menu and select ( Device Manager ).
Step 2: Locate the Micro SD card in the device manager (under “Disk Drive” or “Universal Serial Bus Controller” ). An exclamation mark on the icon indicates a driver issue.
Step 3 : Right-click on the Micro SD card device and select ( Update Driver ).
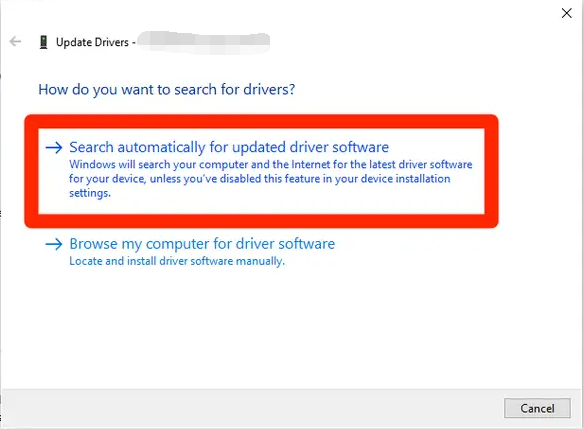
Step 4: Select Browse my computer for driver software if you have a suitable driver, or Search automatically for updated driver software if unsure. Follow the prompts to complete the operation. Check if the Micro SD card issue is resolved after the update.
3. Check the system file error of the Micro SD card
Use the Windows file system error checking function to check and repair the Micro SD card. Ensure the card is connected to the computer. Perform the following operations in File Explorer . If the card is not displayed in File Explorer, use Disk Management .
Step 1 : Connect the Micro SD card to the Windows computer through a card reader.
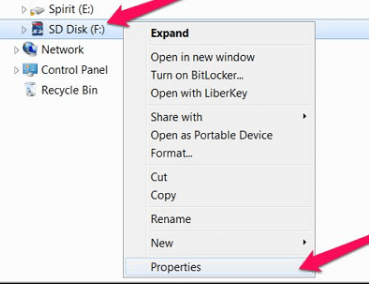
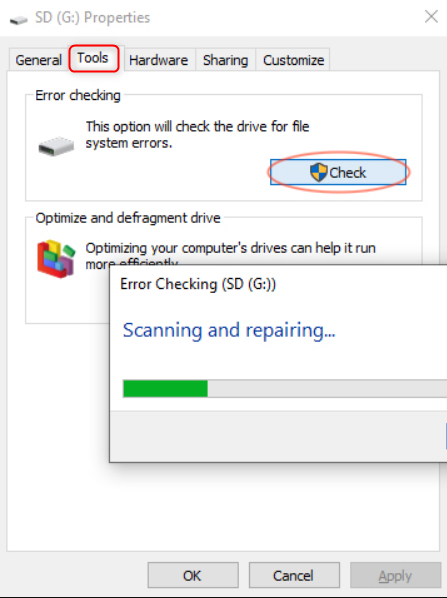
Step 2 : Open the file explorer, right-click on the Micro SD card, select (Properties) > (Tools) , and click (Check) in “Error checking”.
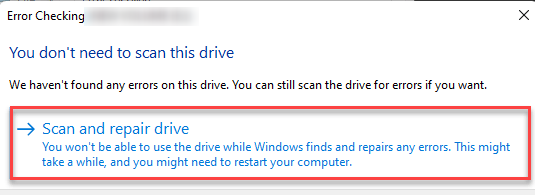
Step 3 : Click ( Scan and Repair Drive ). If errors are found, restart the computer to repair the file system. After fixing the drive, eject the Micro SD card and reinsert it into the Android phone to check if the Micro SD card is recognized.
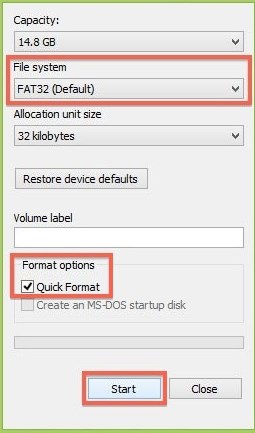
Formatting the Micro SD card can resolve many issues, and you can format it to a file system supported by Android phones, such as FAT32 or exFAT . If the Micro SD card is not shown in the PC file explorer, right-click the Start menu and enter Disk Management to format it.
Step 1 : Connect the Micro SD card to the computer via a card reader.
Step 2 : Copy the entire Micro SD card data to other disks for data backup.
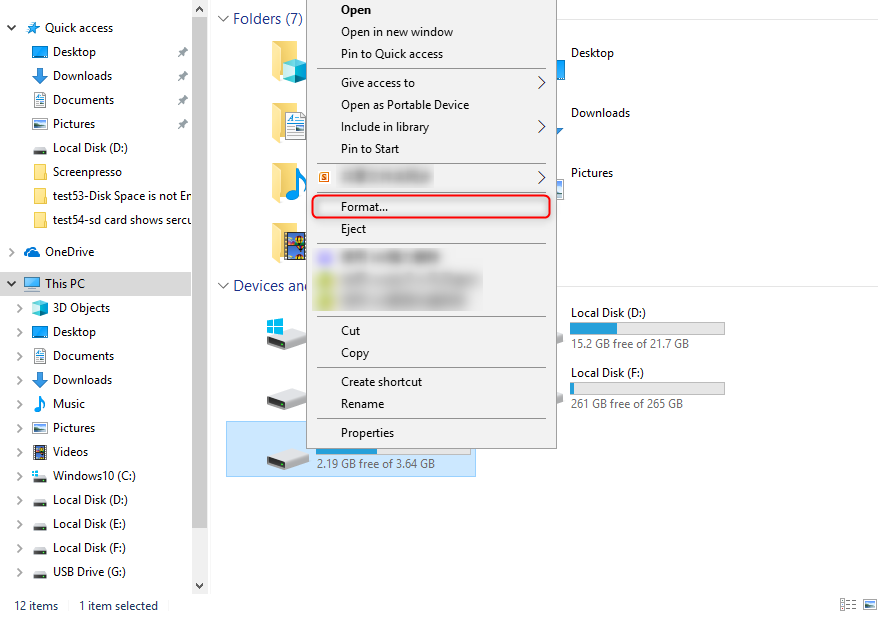
Step 3 : Open File Explorer, right-click on the Micro SD card drive, and select ( Format ).
Step 5 : Click ( Start ) to start formatting the Micro SD card. After safely ejecting the Micro SD card, reconnect the Android phone to check if the problem is resolved.
5. Use Chkdsk to repair damaged Micro SD card
If the Micro SD card is not physically damaged and the computer can recognize it (displayed in disk management ), you can use the Chkdsk tool to repair logical errors. Note: This method will erase the data on the Micro SD card , so please back up important files first.
Step 1 : Connect the Micro SD card to the computer through a card reader.
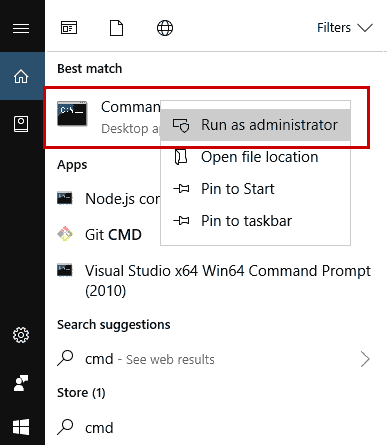
Step 2 : Search for ( cmd ) in the computer search box, right-click ( command prompt ), and select ( Run as administrator ).
Step 3: In the command prompt, enter
chkdsk H: /f
(H: is the Micro SD card’s drive letter, /f is the repair parameter), and press Enter . The repair duration depends on the damage severity and storage size. Exit Command Prompt when complete.
Tips If this command does not repair the Micro SD card , try chkdsk H: /r . The /r parameter finds bad sectors and restores readable information, including the functionality of /f with additional analysis for physical disk errors .



Comments
0 comments
Please sign in to leave a comment.