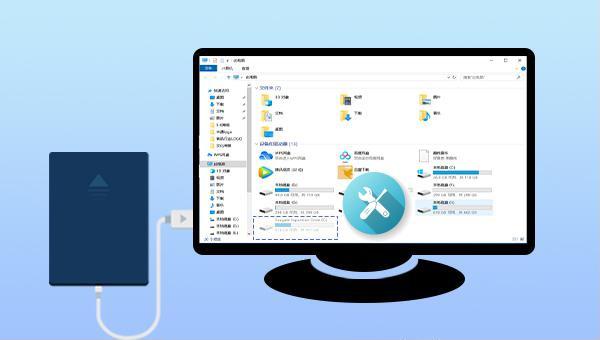
I. The mobile hard disk is not displayed in My Computer , but it can be displayed in Disk Management
1. There is a problem with the drive letter of the mobile hard disk
If the mobile hard disk is not visible in “My Computer” after connecting it to the PC but appears in “Disk Management” , the issue may stem from a drive letter conflict . To fix this, change or reassign the drive letter through the following steps:
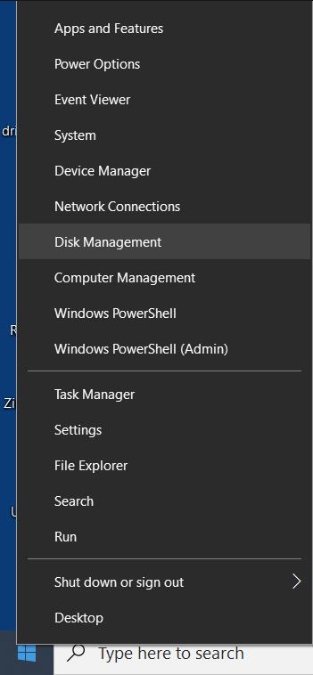
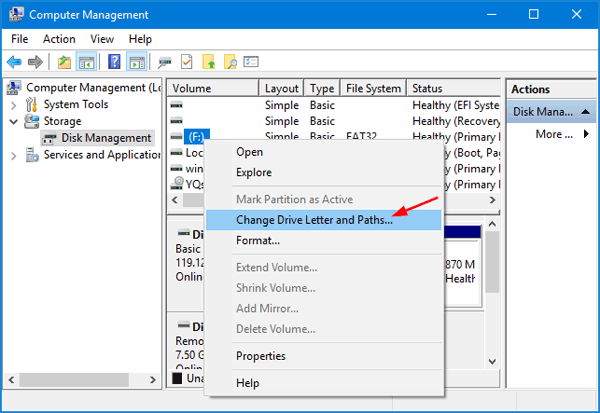
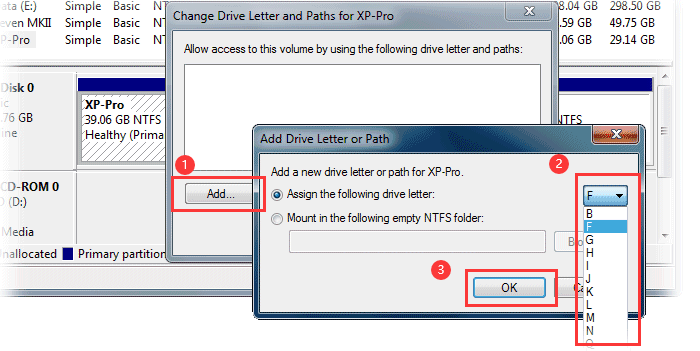
Step 1: Simultaneously press Windows key + X , choose “Disk Management” from the menu, right-click on the external hard drive, and select “Change Drive Letter and Paths.”
Step 2: Click ( Add ), assign a drive letter to the hard disk, and then click ( OK ).
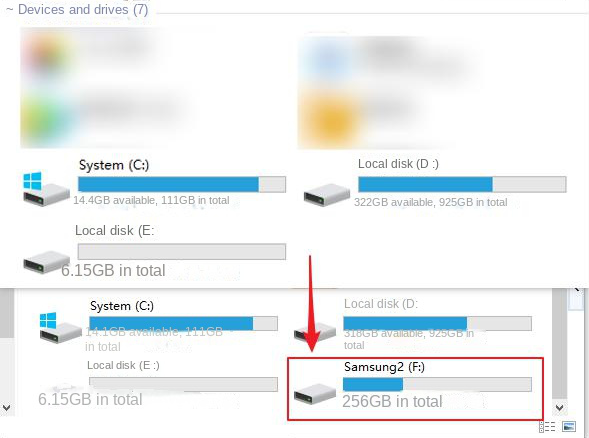
Step 3: Open My Computer or This PC on the desktop, and the previously missing hard drive should now be visible.
2. The mobile hard disk is used for the first time and has not been initialized
When your external hard drive appears as “ Not Initialized ” or shows as “ Unallocated ” in Disk Management, it won’t be visible in My Computer or File Explorer. To resolve this issue, you need to initialize the disk and create a new simple volume. Here’s how to do it:
Step 1: Press the
Windows icon + X
key at the same time, and select ( Disk Management ) in the menu.
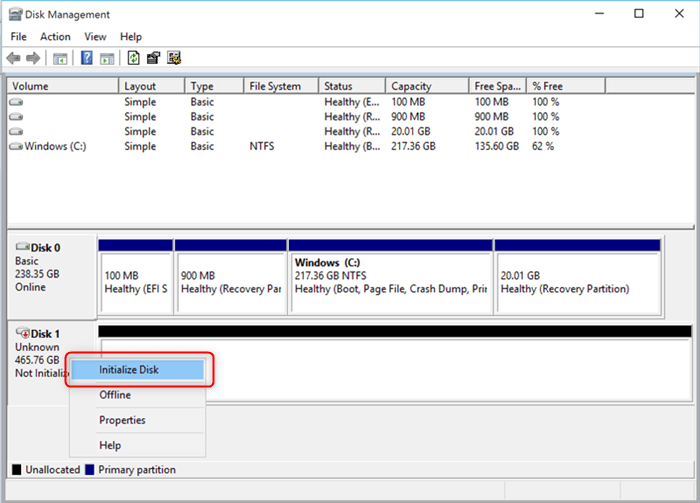
Step 2: If the hard disk is displayed as “ not initialized “, right click on the hard disk and select ( initialize disk ).
“Initialize Disk” will erase the original data in your mobile hard disk drive. If you have important data in it, please try to use
Renee Undeleter to recover the data first!
Step 3: Select the partition type
MBR
or
GPT
and click (OK).
Click here See more information about MBR and GPT.
● The MBR (Master Boot Record) is limited to hard disks up to 2TB ; any capacity beyond that remains unrecognized. Additionally, MBR can only create four primary partitions on a disk.
● The GUID Partition Table (GPT) overcomes the Master Boot Record (MBR) limitation of a 2TB hard disk size and allows users to create unlimited partitions on their storage device.
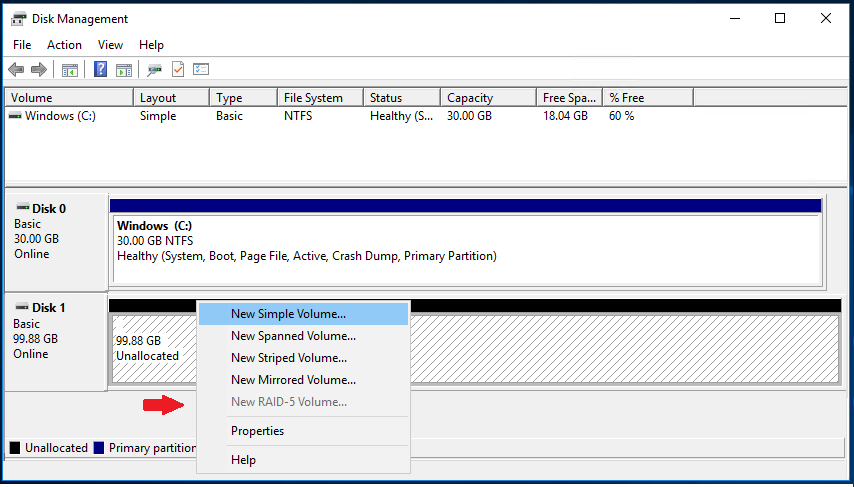
Step 4: After initialization, right-click the “unallocated” hard disk partition, select “New Simple Volume” , and adhere to the wizard’s prompts to designate the partition’s capacity, drive letter, and file system.
If a mobile hard disk partition disappears and becomes unallocated space , you should create a new partition using Disk Management to make it recognizable in “My Computer/File Explorer” . In the event that the vanished partition contained important data , it is advisable to utilize professional data recovery software to recover the lost information. Further instructions on the recovery process are provided below.
3. Use Renee Undeleter to restore mobile hard disk partition data
Renee Undeleter is a data recovery software designed to
recover various data files . It is useful for restoring files that have been
accidentally deleted , lost due to an
emptied recycle bin , or lost after
disk/formatting . The software includes four key features:
file recovery ,
format recovery ,
partition recovery , and
image creation , providing comprehensive solutions for all
data loss scenarios .
Hot Topic - ADs Renee Undeleter – Simple & Powerful Software for Data Recovery 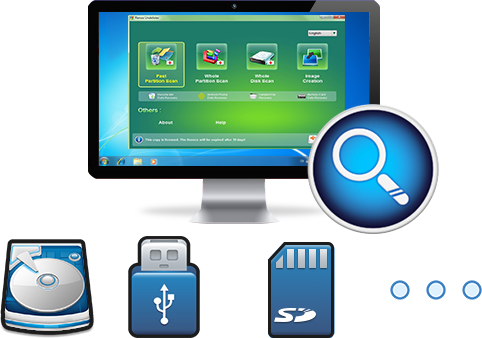
Easy to use Recover data by 3 steps;
Multiple scan modes Fast partition scan, whole partition scan and whole disk scan;
Supported file types Image, video, audio, text, email and so on;
Image creation Create a partition image to read and back up data;
Supported devices SD card, SDHC, SDXC, USB flash drive, hard disk and computer.
▽ Free Trial (Win) ▽ Free Trial (Win)
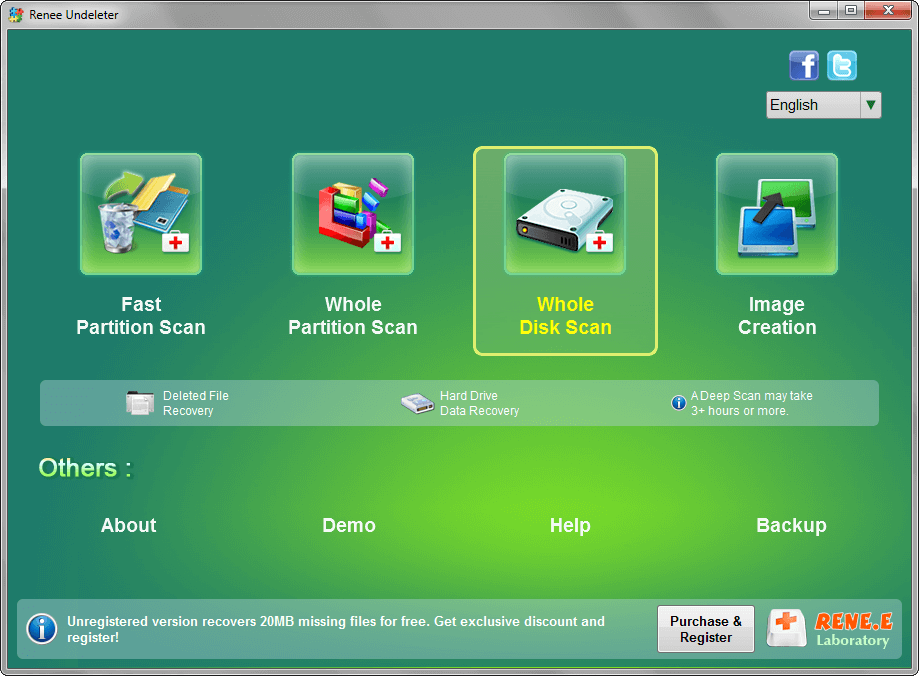
Step 1: Connect the mobile hard drive to your computer. Download, install, and launch
Renee Undeleter . Choose the
‘Whole Disk Scan’ option from the main menu.
Note: Do not install on the disk that needs to restore data, so as not to cause data overwriting.
Data Recovery Function Overview:
-
Fast Partition Scan: Rapidly recovers files lost from accidental deletion or recycle bin clearance.
-
Whole Partition Scan: Restores files from inaccessible or formatted partitions efficiently.
-
Whole Disk Scan: Conducts a comprehensive scan to retrieve partition information and recover data from the entire disk.
-
Create Mirror: Allows creation of a partition mirror image to preserve the current state for backup purposes.
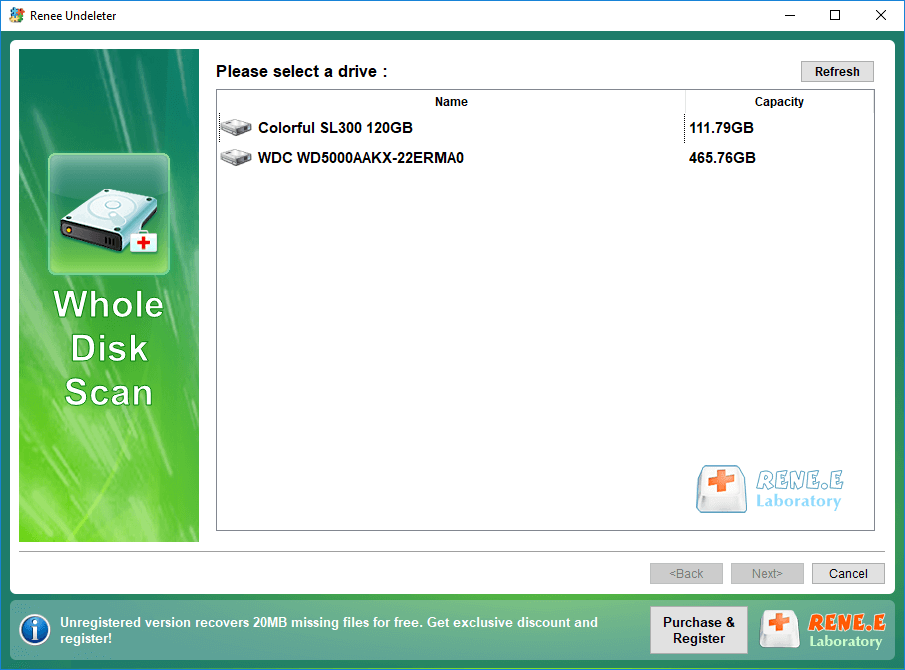
Step 2: Next, select the hard disk device that needs to recover data. After the selection is complete, click (Next).
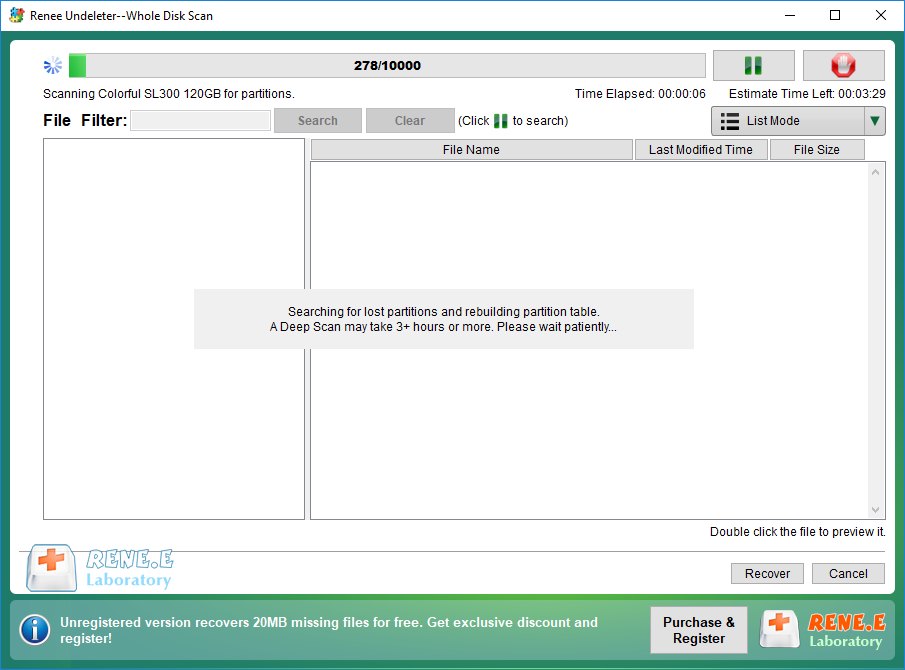
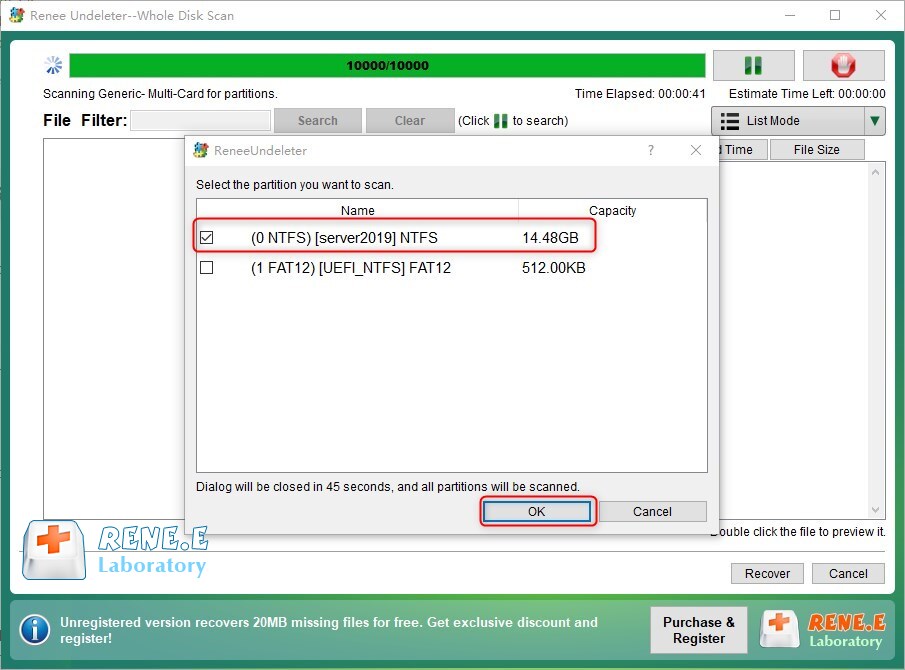
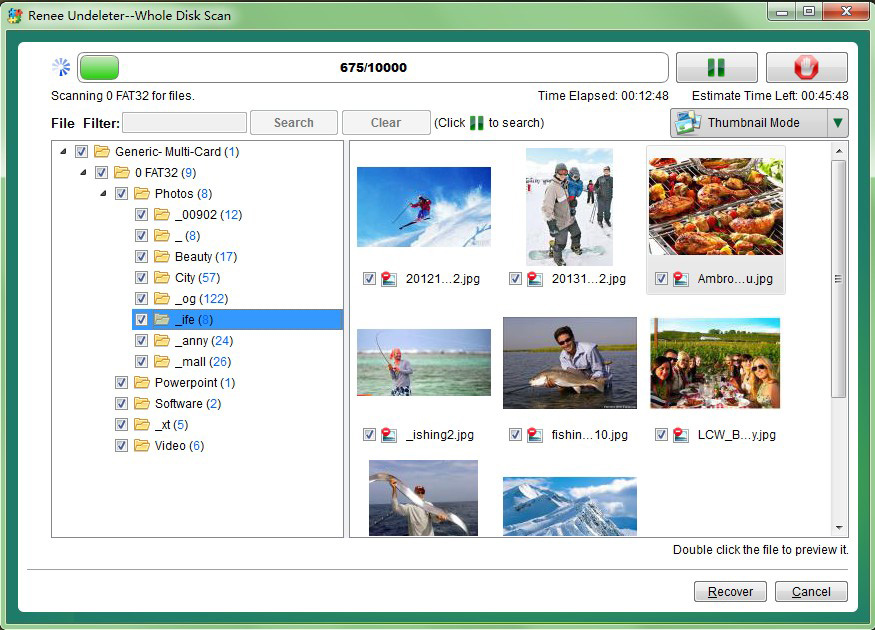
Step 3: Patiently wait for the scan to finish as it identifies all hard disk partitions. Once done, a prompt will surface enabling you to select a specific partition for scanning. In the absence of a selection, the scan will automatically default to all partitions , which may uncover additional files but will also extend the scan time .
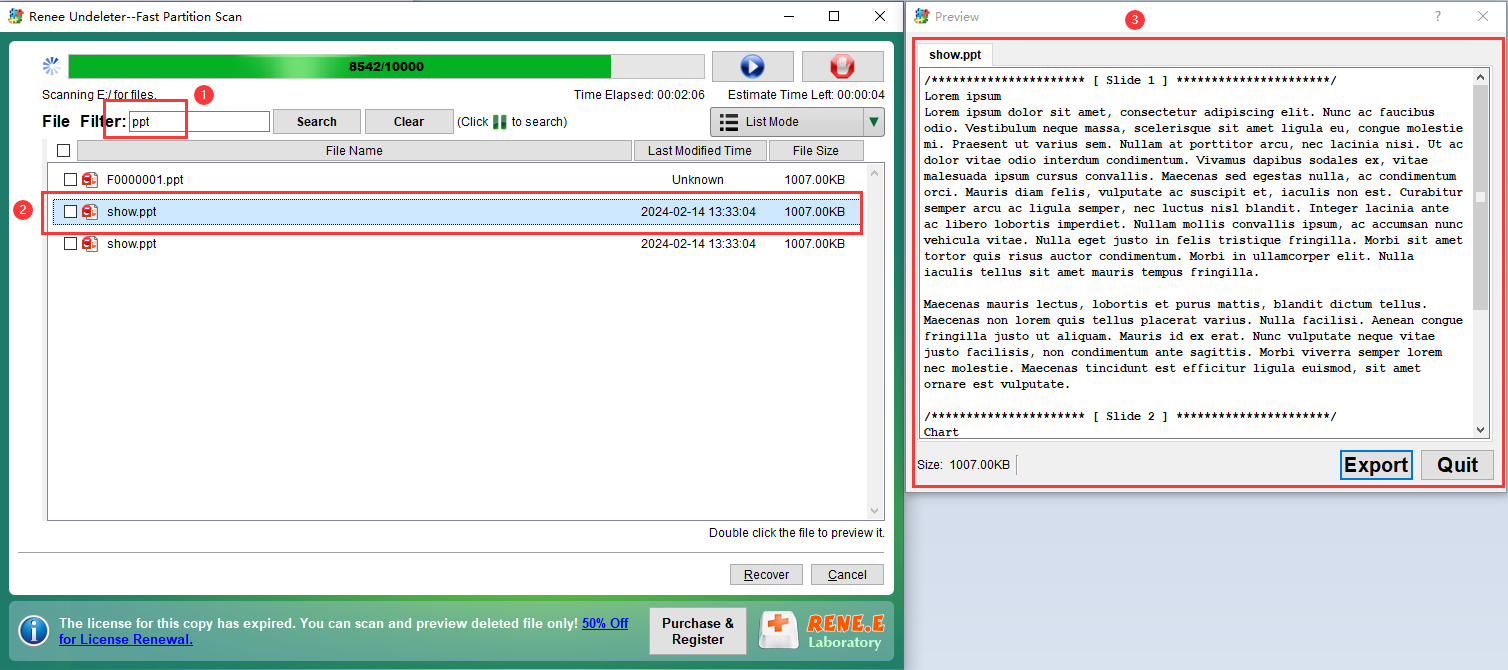
Step 4: Preview files in the partition during the scanning process. Upon identifying all the essential files, select them and click Recover to save them to an alternative location on your computer.



Comments
0 comments
Please sign in to leave a comment.