III. The solution to the unrecognized Maxtor external hard disk
1. Update the hard disk driver
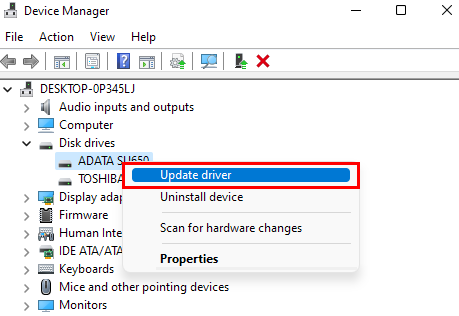
Step 1: Connect the Maxtor external hard disk to the computer, right-click the (Start) menu, and select (Device Manager).
Step 2: Find the hard disk in Device Manager (you can try to find it in “Disk Drive”). Right-click on the hard disk and select the (Update driver) option.
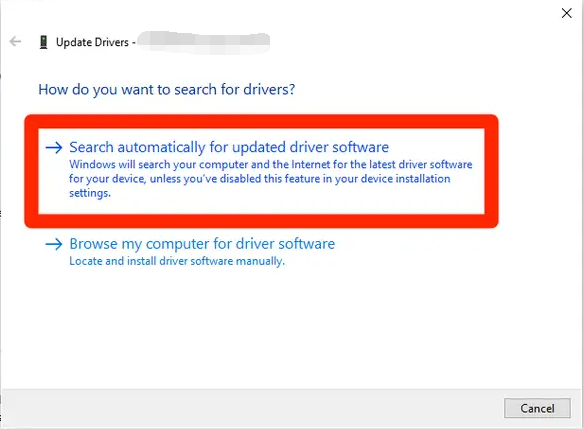
Step 3: Select (Search automatically for updated driver software). Then follow the prompts to complete the operation. After updating, check whether the external hard disk can be displayed normally.
2. Set the Maxtor external hard disk to online mode
If your Maxtor mobile hard drive is offline, it cannot be displayed in Windows File Explorer. You can follow the steps below to make it online so that it appears in File Explorer.
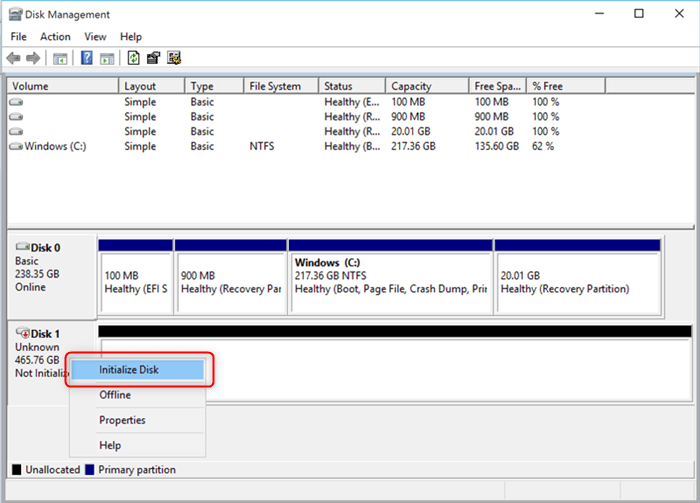
Step 1: Keep the Maxtor external hard disk connected to the computer, right-click (Start) menu, and open (Disk Management).
Step 2: Locate the Maxtor Portable Hard Drive and right click on it, then click (Online).
3. Change the hard drive letter
The Maxtor external hard disk cannot be recognized, or there may be a problem with the drive letter, which can be solved by changing or reassigning the drive letter. Proceed as follows:
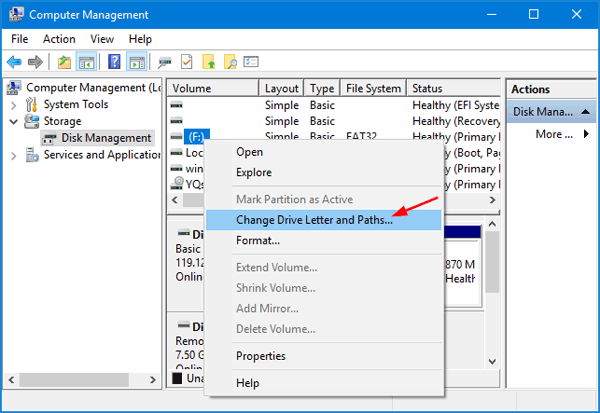
Step 1: Press the Windows icon + X key at the same time, select (Disk Management) in the menu, right-click the target hard disk, and select (Change Drive Letter and Paths).
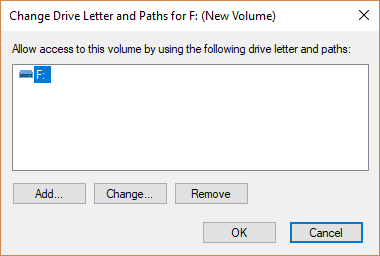
Step 2: Click (Add), assign a drive letter to the hard disk, and then click (OK). Then open the file explorer, select (this computer), and check whether the hard disk is displayed.
4. Clear the hidden or no default drive letter attribute
If you’re having trouble locating your Maxtor mobile hard disk every time you connect it to your computer, it could be due to the hard disk having a hidden or no default drive letter attribute. This means that the system won’t automatically assign a drive letter to the hard disk, making it impossible to install on Windows 10. To resolve this issue, you can either manually change the drive letter (Method 3) each time you connect the hard disk, or you can remove the hidden attribute of no default drive letter by following these steps (only needs to be done once). This will allow the system to automatically assign a drive letter to your mobile hard disk.
Method 1: Clear hidden attributes
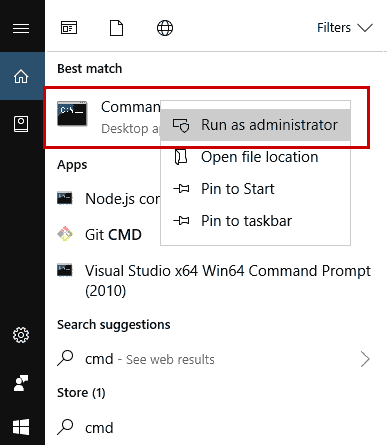
Step 1: Search (cmd) directly in the search box in the lower left corner, and select (run as administrator) to open the command prompt.
Step 2: Enter ( dispart ) command and press the (Enter) key. You need to press the (Enter) key every time you enter a command.
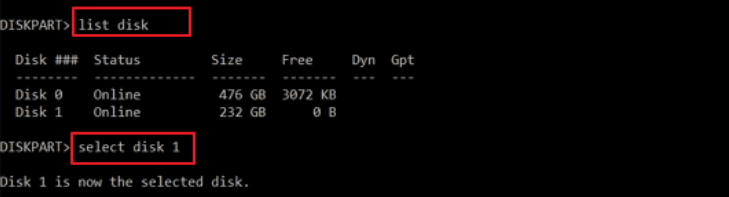
Then enter list disk to list all disks in the computer.
Type select disk 1 (1 is the disk number) to select the target disk.
Enter list volume to list all disk partitions, and it can be seen that volume 2 is in the “hidden” state.
Enter select volume 2 (2 represents the disk partition number) to select the hidden disk partition.
Type attribute volume clear hidden to clear the volume’s hidden attribute.
Method 2: Clear the no default drive letter attribute
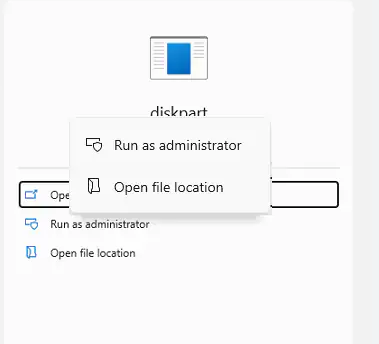
Step 1: Type “diskpart” in the taskbar search box, right click on the search result and select (Run as administrator).
Step 2: Then enter the following commands, and you need to press the (Enter) key every time you enter a command.
Type list disk to list disks.
Enter select disk 2 (2 indicates the disk number) to select the disk.
Type list part to list the partitions.
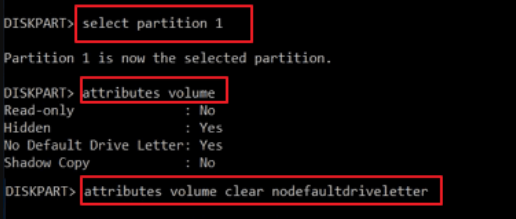
Enter select partition 4 (4 indicates the partition number) to select the partition.
Type attributes volume to check disk partition attributes. Check the properties of (Hidden) and (No Default Drive Letter), where you can see that the (Hidden) property is (No), and the (No Default Drive Letter) property is (Yes).
Enter attribute volume clear NoDefaultDriveLetter to clear the attribute for (no default drive letter). If the (hidden) attribute is (Yes), you can also enter the (attributes volume clear hidden) command. After that, safely eject the hard disk, reconnect it to the computer, and open the file explorer to check whether the hard disk can be displayed normally.



Comments
0 comments
Please sign in to leave a comment.