
Summary
Creating restore point in Windows 7 can help users to prevent computer from system crash. Restore point could restore computer to normal work status before corrupted. Following will introduce how to create restore point in Windows 7 and how to use it to make restoration. Also, data backup and data transfer method will be introduced as well.

Windows will create a system restore point automatically when Windows get a big update (like installing or uninstalling software or updating driver software). Also users can create the restore point manually. Creating restore point can help users restore system to the previous normal work status when PC get corrupted because of mistake operations.
If you want to create a restore point in Windows 7, please follow the instructions below:
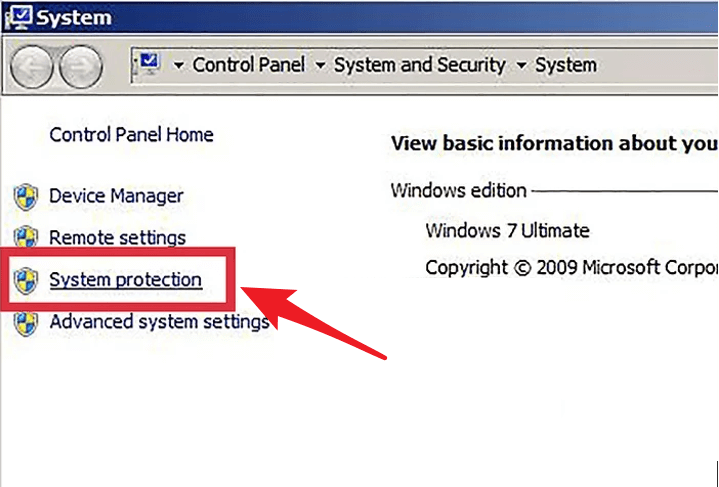
Step 1: Click [ Start ], [ Control Panel ] and then find [ System and Security ]. Please select [ System Protection ] on the left side.
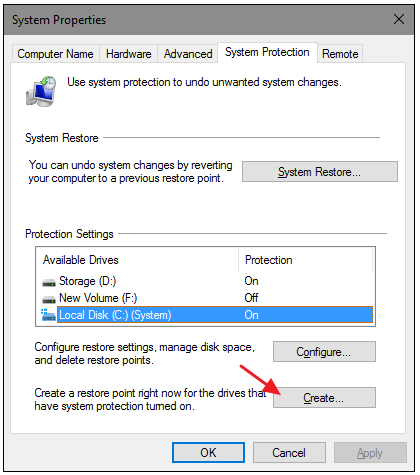
Step 2: Click [ Create ] button.
Step 3: Type the description of the restore point. Then click [ Create ].

Step 4: Click [ Close ] as the create finished.

Following will introduce how to restore system with the created restore point in Windows 7.
Step 1: Search [ System Tools ] in search of Start menu and then select it.

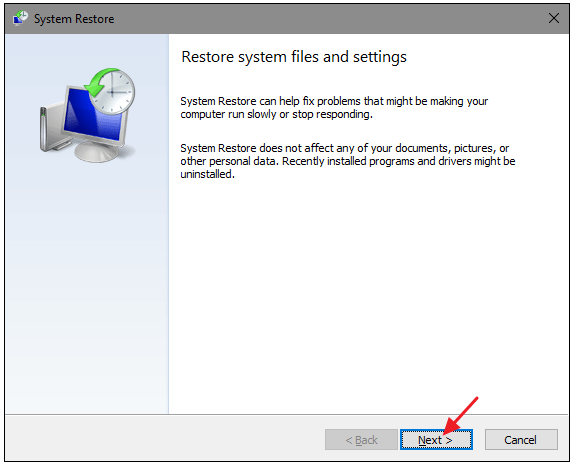
Step 2: Click [ Next ] in the pop up Restore system files and settings window.
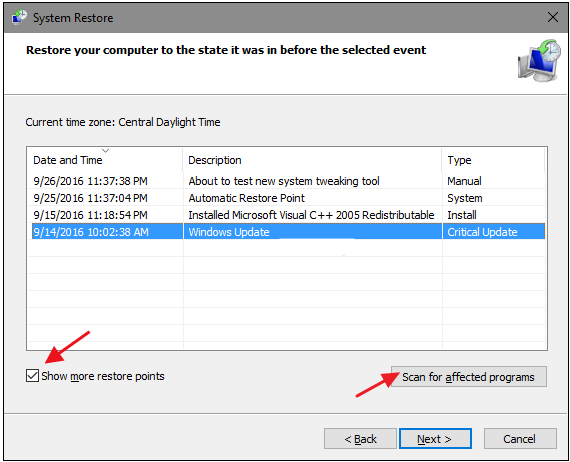
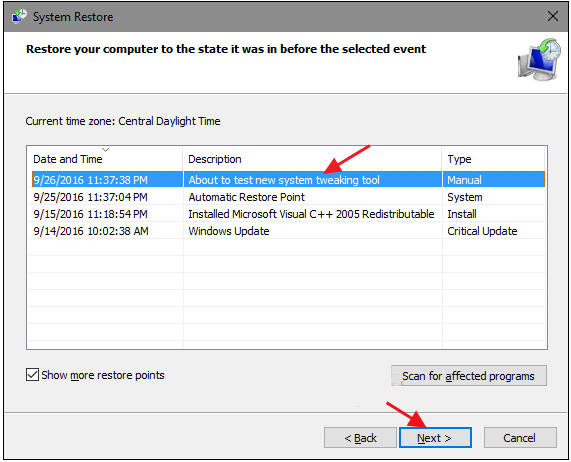
Step 3: Check [ Show more restore points ] to show all the restore point and then click [ Scan for affected programs ] to browse all the affected software which will be uninstalled in the restoration.
Step 4: Select the target restore point and click [ Next ].
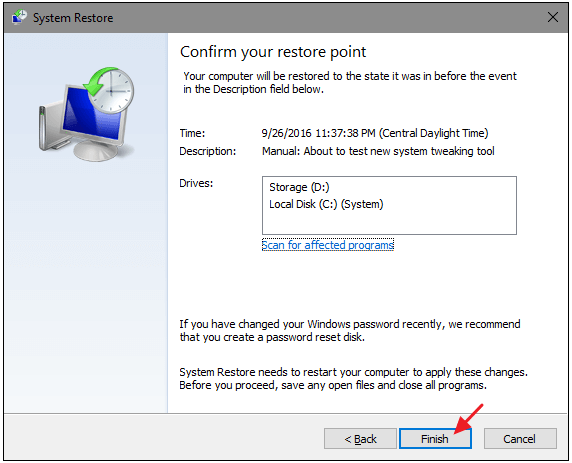
Step 5: Click [ Finish ] to process the restoration.
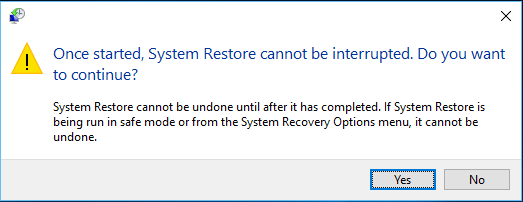
Once system begins to restore, users can not interrupt the restoration. Here, please click [ Yes ] to confirm.
Although creating Windows restore point could help user backup the system, it still be with some disadvantages like users can not access to the restore point if system is crashed, the backup file takes up too much disk space, the restore needs hours, ETC. Besides, creating Windows restore point is complicated which could be difficult for those who are not so familiar with computer. Following will introduce another better backup method.
Renee Becca , a backup and restore tool, can help users backup and restore important data like software, system configurations, emails, photos, movies, files, bookmarks, etc.. Utilizing the advanced differential/incremental backup scheme, it can save much disk space and time for users. Besides, it can clone disk and migrate system for users.

Detailed steps about how to backup system with Renee Becca:
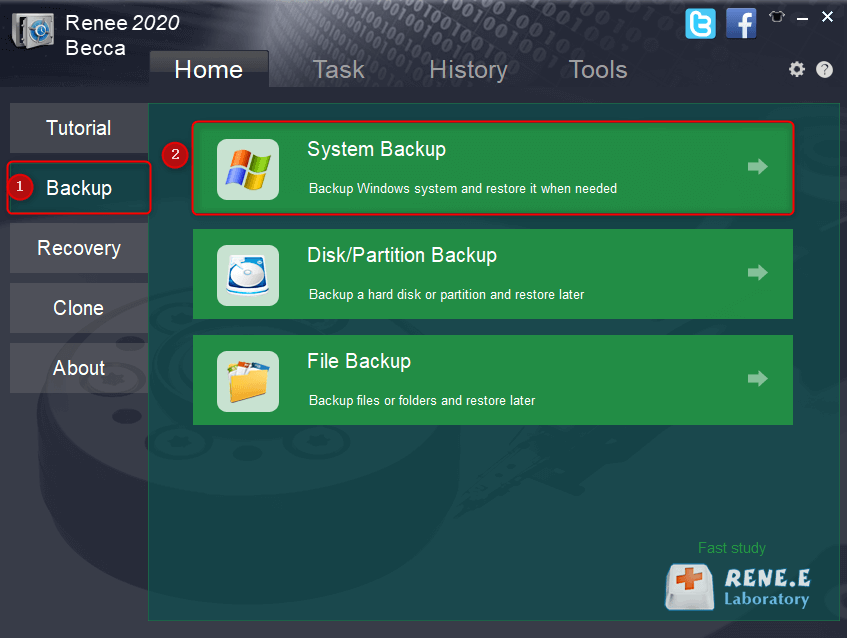
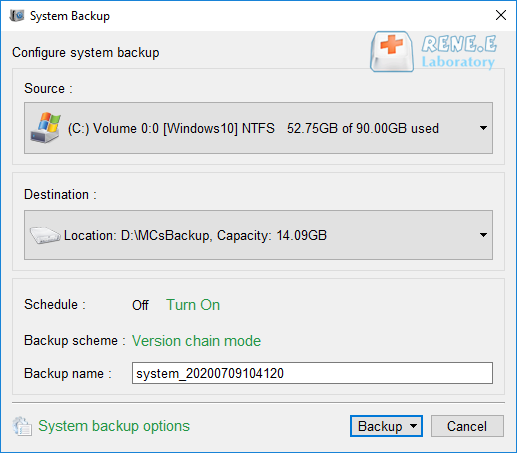
Step 1: Download and install Renee Becca in your Windows 7 computer. Then run Renee Becca, select [ Backup ] then [ System Backup ].
Step 2: Select desired disk in Destination. You can name the backup file and select the auto backup plan in [ System backup options ]. If you do not need the auto backup, please click [ Backup ] directly.
Step 3: You can check the process of the backup task in [ Task ]. When you want to restore the backup system, please go to here for details.

Besides, if you can not go into system to make the restoration, you may think of the system reinstallation. Before you reinstall the system, please transfer all data in the original system to safe place. Renee Passnow could help you transfer data without running Windows.
Relate Links :
How to Clone Windows 10 to SSD?

16-06-2021
John Weaver : SSD, a powerful data storage device for computer, provides faster boot speed and data access speed than that...
What if Task Manager Can Not Open?

25-04-2021
Jennifer Thatcher : Task Manager, the built-in system monitor program of Windows, offers the information of computer hardware and running software....
Comments
0 comments
Please sign in to leave a comment.