
Summary
If we want to get the best performance of the SSD, we should install an entirely new system. However, many users still prefer to use Windows 7 or the hardware of the their computer can not afford the requirement of higher Windows editions. So, we are going to introduce how to clone Windows 7 to SSD and optimize the system settings to get the best performance of the SSD.

With Renee Becca, we can transfer Windows 7 to SSD with 3 simple steps. Following will introduce how to clone Windows 7 to SSD with Renee Becca and the other functions in Renee Becca.
Renee Becca is the software specializing in backing up and restoring system/drive data, such as programs, system configuration, emails, photos, videos, documents and bookmarks. With the application of the incremental/differential backup technology, it can save time and disk space. Besides, it can back up partition, disk, folder and clone disk.

Here are the steps:
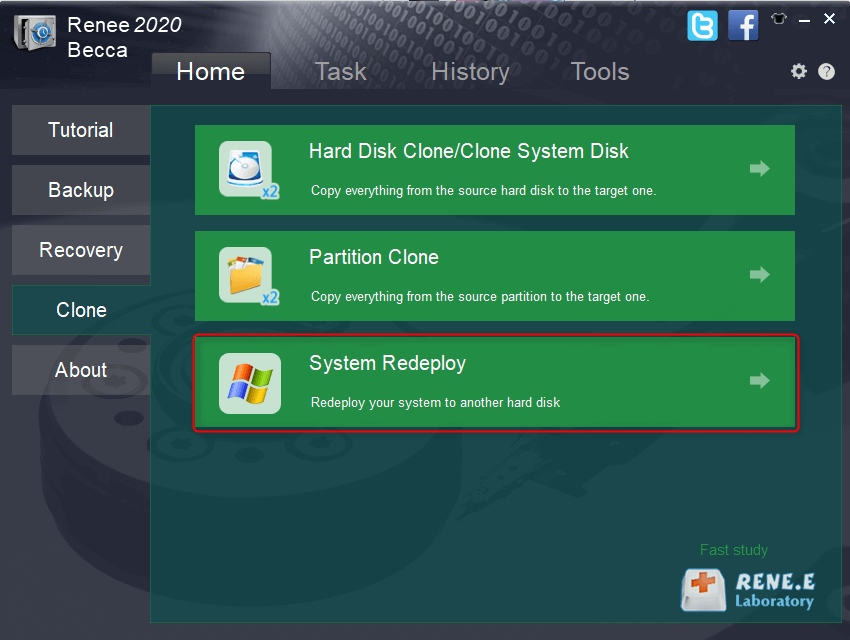
Step 1: Download and install Renee Becca. Then, go to Renee Becca and select [ Clone ] – [ System Redeploy ].
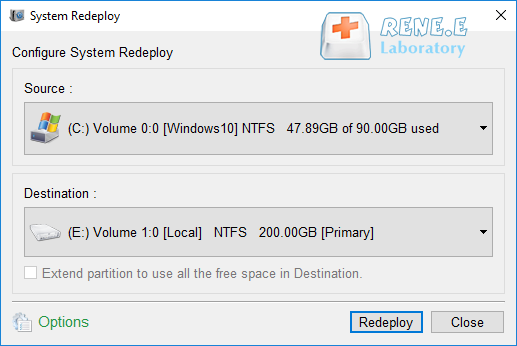
Step 2: Please select the original disk which saves Windows system and the target disk. Then click [ Redeploy ] to process the system migration.
Note: You should replace the solid state disk with a larger one. When the clone finish, you will get a new disk with the same system. All configurations and software will be reserved as the same in the original disk. Also, data in the original disk will not be emptied.
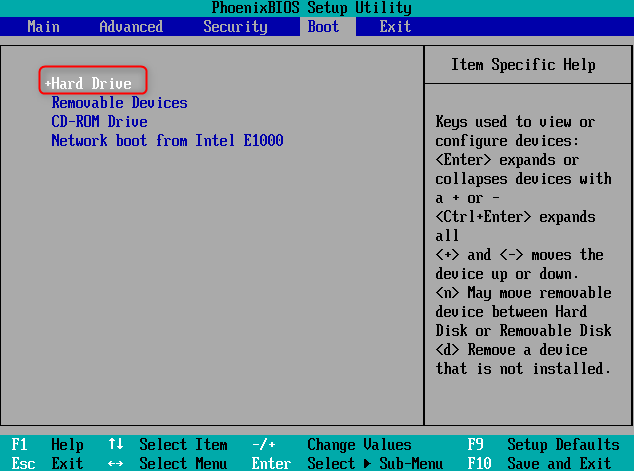
Step 3: Click on [ OK ] as the process is finished. Then, you should set the new disk as the first boot order in BIOS and get into the system. Click here to learn about how to change the boot order in BIOS .
The above part introduces how to clone Windows 7 to SSD. To get the best performance of the SSD, we can follow the recommendations to optimize the system. Let’s go for it.
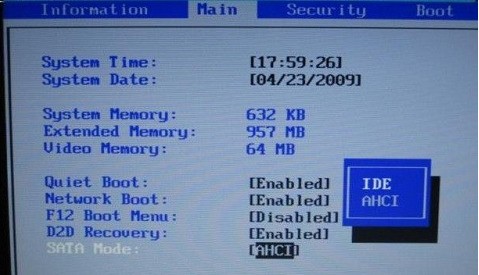
AHCI mode can help us get the best performance of the SSD. First of all, you need to make sure the read/write mode of your SSD is AHCI. If you install Windows 7, please go to BIOS to ensure whether the AHCI mode has enabled. Please follow the steps here to go:
Press [ Win+ R ] and type [ Regedit ] to register and then go to “HKEY_LOCAL_MACHINE\SYSTEM\CurrentControlSet\Services\msahci”. Then right click [ Start ] and change the value to be [ 0 ]. Finally, restart the device.
File index can help users reach target files or folder faster. However, the data reading and writing time of SSD is fare quickly which will take only 0.1ms. Therefore, there is no need to enable the File Index function in SSD or the lifespan of the SSD will be shorten. Here are steps about how to disable the File Index:
Go to [ Computer ] and then right click the partition of the SSD and select the [ Properties ] option in the menu. Then please do not check item [ Allow files on this drive to have contents indexed in addition to file properties ]. And click [ OK ] to save this settings. Please disable this option in each partition of the SSD. (Attention: It will require the administrator to authorize the operation sometimes.)
In default, Windows 7 will disable the Disk Defragment function for SSD disk automatically. However, this function could be enabled for some specific reasons. In fact, SSD will not have any fragmented data. As a result, there is no need to fragment the SSD. Besides, frequent disk defragmentation will also harm the health of the SSD.
How to check the Disk Defragment function in Windows 7:
Open the target Windows 7 computer and then click [ Start ] then [ Accessories ]. Find [ System Tools ]then open [ Disk Defragmenter ]. Next click [ Configure schedule ] and do not check [ Run on a schedule(recommended) ] in the pop up window.
Sleep is a useful function for traditional disk which can help users get access to the software they use recently. However, it is meaningless for SSD. Because system installed in SSD can start in 20 seconds which is the same time duration to raise system up in HDD from sleep mode. Please disable this function if you install Windows 7 in SSD.
Detailed steps of how to disable the sleep mode in Windows 7:
Open Windows 7 computer and press [ Win + R ]. Type [ cmd ] in the pop up window as well as the command [ powercfg-h off ]. Then press [ Enter ] to disable the sleep mode.

Comments
0 comments
Please sign in to leave a comment.